


A fast notice earlier than we start: as of June 2020 this information is now over 2 years previous, some modifications over these final two years (together with modifications to Gradle) appear to have thrown some further issues for customers into the combo. Minecraft Forge for 1.7.10 itself has not been up to date since 2015. I’m leaving this information on-line as a reference for 1.7.10’s modding neighborhood, however I can’t assure that issues at the moment are working the identical as they did on the time of writing. Chances are you’ll discover new errors that I’m unfamiliar with and I’m unable to supply a lot help as I haven’t been working with 1.7.10 in over a yr now. In case you do come throughout an error and have an answer for it please remark beneath or contact me straight and I can replace the article.
On this put up I’ll be explaining the right way to get began modding Minecraft. For the sake of this tutorial I’ll be working with Minecraft 1.7.10 (which I’m reasonably acquainted with modding for). Forward, we’ll get the instruments wanted to mod Minecraft, setup a mod mission, and create our personal customized block: “Amethyst Ore” from which we’ll have the ability to mine Amethyst and we’ll mod this block such that it generates randomly all through the map. I’ll advocate that you simply meet the next stipulations to get essentially the most out of this information:
- A cursory information of object-oriented Java programming could be extremely helpful however isn’t essentially required. We’ll be writing quite a lot of dozen traces of Java code throughout a handful of lessons although so you probably have an thought of the right way to code it’ll make issues simpler.
- An understanding of the right way to use Minecraft Forge. As a requirement, you’ll want to know the right way to set up Minecraft Forge and the right way to set up mods for it, in any other case, how would you check your mod?
Need to learn this story later? Reserve it in Journal.
Fortunately, each object-oriented Java programming and Minecraft Forge utilization have already got numerous tutorials out there on-line, so in the event you’d wish to attempt following together with this information and confer with Google for different such tutorials in the event you want some supporting data.
Let’s have a fast overview first. I’ve damaged this information down into 5 steps, though the steps will not be equal: they differ in issue, and so they develop in measurement till we attain step 5, which is the place we’ll actually get into the “modding” half and so it’s the most important step by far. The steps are:
- [Step 1] Getting Your Instruments: Java & Eclipse
- [Step 2] Getting Your Instruments: Forge
- [Step 3] Organising Your Eclipse Venture
- [Step 4] Decompiling Minecraft
- [Step 5] Modifying Minecraft
[Step 1] Getting Your Instruments: Java & Eclipse
First issues first — you’re going to want the Java Growth Equipment (JDK). You could find it on Oracle’s web site right here. As Oracle places it on their web site: “The JDK is a growth atmosphere for constructing purposes, applets, and parts utilizing the Java programming language.” To clarify a bit on that, you may consider your Minecraft mod as a “part” in that context.
In any case, when you’ve put in the Java Growth Equipment, subsequent you’ll want the Eclipse IDE. An “IDE” is an Built-in Growth Setting, and at a primary look you may suppose IDE’s are fancy textual content editors for writing code in, though they’ve quite a lot of options to assist us with our programming past that.
In any case, the Eclipse IDE is our go-to device and is probably the most well-liked IDE for writing Java. Obtain the Eclipse installer right here, and while you begin it up, it’s best to get prompted with a window just like this:

You’ll wish to choose the primary selection: “Eclipse IDE for Java Builders”. For these of you who’re all-new to this: Minecraft’s code is written within the Java programming language so consequently that is the programming language we’ll be working with to create mods for it. The Eclipse installer is sort of simple, you’ll be able to simply comply with alongside accepting the usual choices and choose “Launch” as soon as it has accomplished. Lastly, when the set up is over and the Eclipse Launcher begins up it’ll immediate you to pick out a listing on your workspace, I’m naming mine “MinecraftWorkspace” as you’ll be able to see right here:

Be at liberty to verify the “Use this because the default and don’t ask once more” field in the event you’ll solely be utilizing Eclipse on your Minecraft modding, as you’ll have the ability to handle a number of initiatives on this workspace. In any other case, click on that Launch button on the backside and we’re prepared to maneuver on to the following step.
[Step 2] Getting Your Instruments: Forge
Now we’ll have to get Minecraft Forge, particularly we’ll need the 1.7.10 Minecraft Forge as we’ll be modding Minecraft 1.7.10. It’s necessary that the variations match up, belief me. Head right here to get the latest model of Minecraft Forge for 1.7.10.

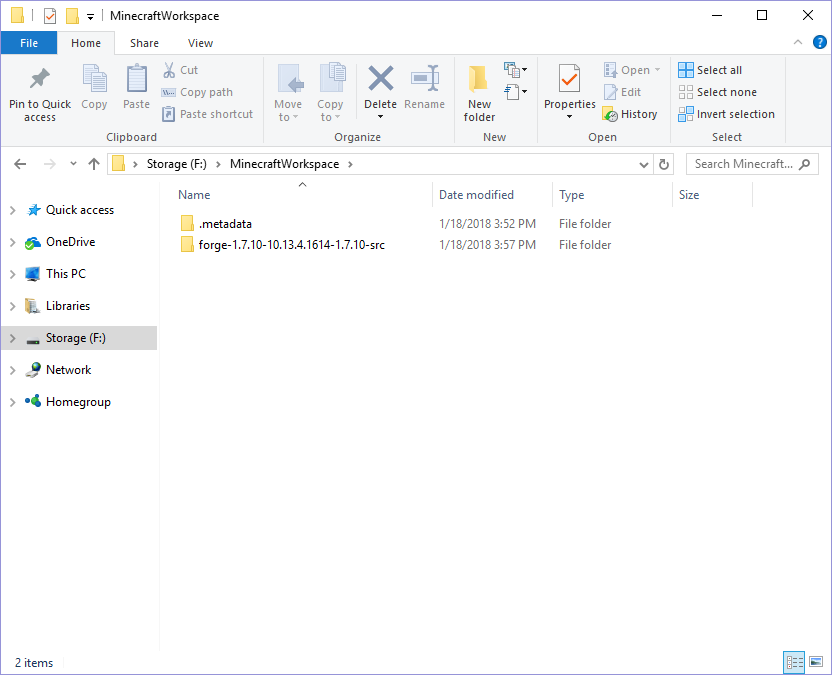
That is the Minecraft Forge web site, you’ll discover there are a number of downloads out there. This time round, ignore the “Home windows Installer” and obtain the “Src”. Will probably be a .zip file, extract this and drag the ensuing folder into your MinecraftWorkspace listing that we created with Eclipse within the earlier step. Your MinecraftWorkspace listing ought to now look one thing like this:
[Step 3] Organising Your Eclipse Venture
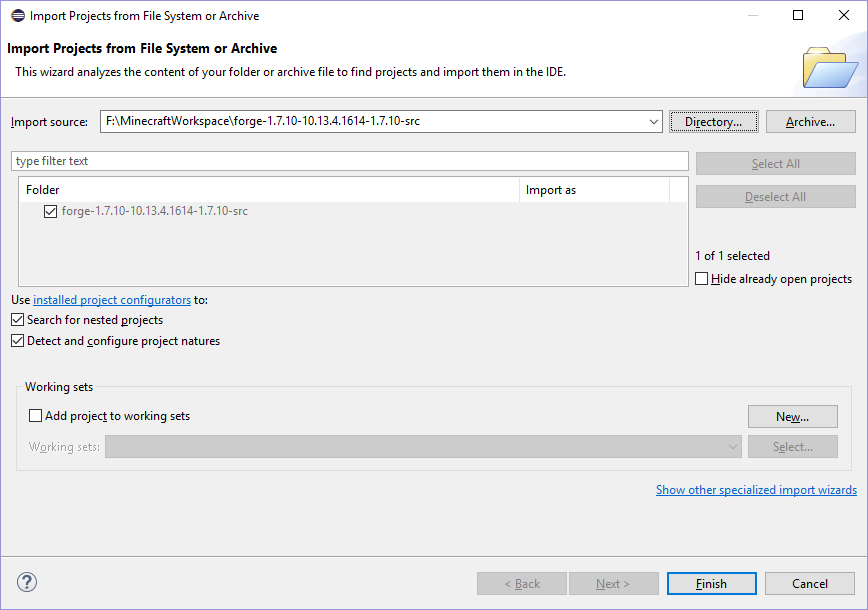
Again in Eclipse, assuming you’ve left it operating, it’s best to end up on the ‘Welcome’ display screen. From right here, merely click on File -> Open Initiatives from File System… after which navigate to your Minecraft Forge listing which you’ve simply positioned in your MinecraftWorkspace listing within the earlier step. For instance, right here is mine:
When you’ve chosen your Forge listing, click on the End button. At this level it’s best to see one thing like this:

If, for no matter cause, this view doesn’t seem for you robotically, simply navigate to Window -> Present View -> Package deal Explorer. In any case, try to be seeing that we now have an ExampleMod.java file — an instance mod for Minecraft, nevertheless try to be seeing that it has a variety of errors. Let’s repair these.
[EDIT (December 2020)]: Earlier than continuing to Step 4 you’ll need to make some fast fixes to your construct.gradle file as a consequence of modifications that require Gradle to now use HTTPS as an alternative of HTTP. See this Git-Hub Gist for an instance construct.gradle file with the fixes you’ll have to get going. (Take discover of the feedback in that instance file on traces 1, 6, and 25).
[Step 4] Decompiling Minecraft
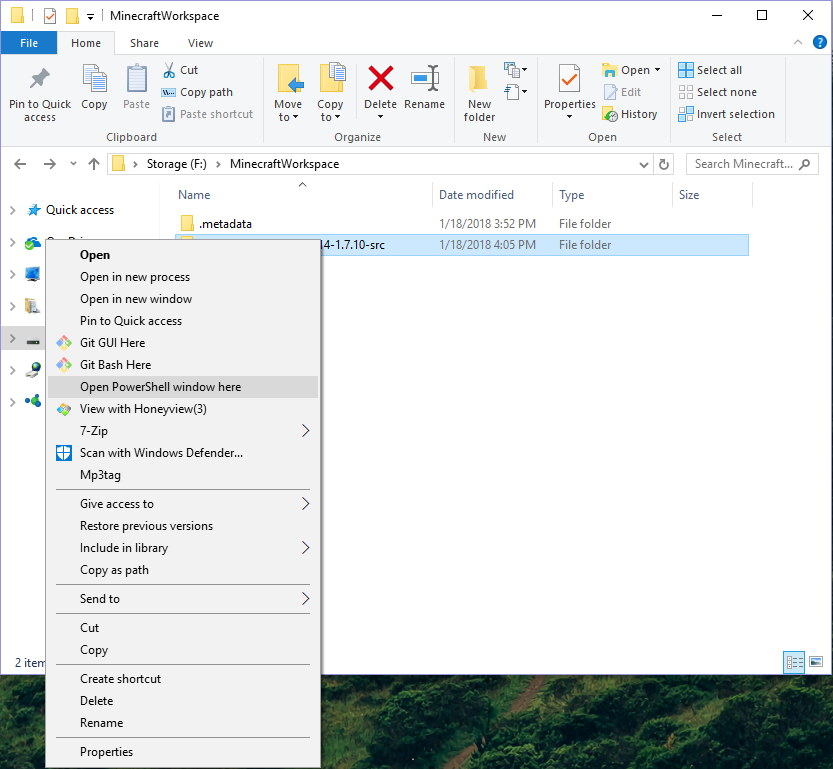
Let’s open up our MinecraftWorkspace listing and do a Shift+Proper Click on on our Forge folder, choosing the “Open PowerShell window right here” choice to start out up PowerShell.
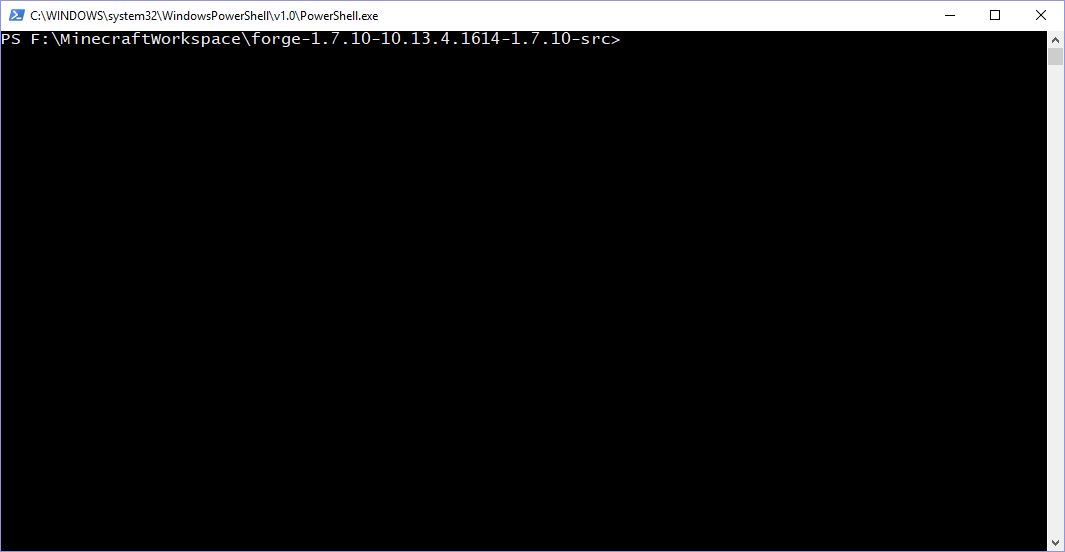
You must see the next (take notice that try to be situated straight contained in the ‘forge-1.7.10-…’ listing):
Right here we’ll enter:
.gradlew duties
This may present us all of the out there duties we will run, there are fairly just a few, however we’re most interested by operating “setupDecompWorkspace” so let’s go forward and do this by coming into:
.gradlew setupDecompWorkspace
This command will run for a good period of time, because it must decompile Minecraft for us. Fortunately, we’ll solely want to do that as soon as. You’ll comprehend it’s completed as a result of it’ll say “BUILD SUCCESSFUL” if all the things goes in accordance with plan. This may setup our surroundings such that we’re prepared to change Minecraft. Subsequent we’ll have to run a closing command:
.gradlew eclipse
This command will arrange an Eclipse mission (which we’ll be working in) for us. This command will run a good bit faster, and when it’s completed it’s best to discover that the errors have vanished from our Eclipse mission. Helpful!
[EDIT (September 2019)]: Chances are you’ll discover you’re nonetheless having import errors at this level. This appears to occur for some readers however not others. I haven’t precisely found out why, however plainly eradicating your mission from Eclipse and re-importing it might resolve the issue in some instances.
[Step 5] Modifying Minecraft
In case you haven’t had an excessive amount of bother following together with the setup section of this tutorial, congratulations, we’re now prepared to start out modding Minecraft. You’ll discover that this Step 5 is sort of prolonged. I needed to comprehensively show the right way to add and customise a brand new block for you, don’t fear if it appears intimidating we’ll undergo it step-by-step. For now, we’ll get began by making a customized block — don’t fear I’ll provide some textures so that you don’t have to be a pixel artist simply but. In any case, it’s best to now go forward and open up your ExampleMod.java file by navigating to it within the Package deal Explorer pane.
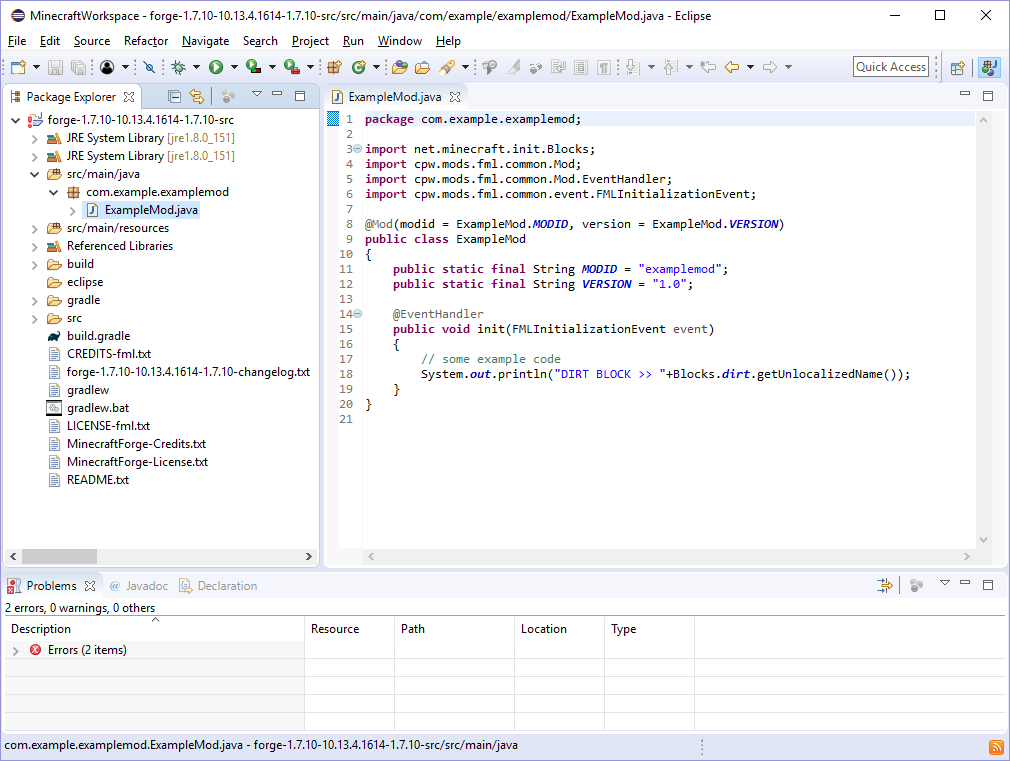
You’ll discover that this code actually isn’t doing a lot. That’s okay, we’ll add a few of our personal code to spruce issues up a bit. Let’s begin by eradicating that System.out.println() and making a skeleton for a brand new non-public class. The code inside our ExampleMod class ought to now appear to be this (all through this tutorial I’ll be bolding code that I’ve added in that step, so pay cautious consideration to the bolding!):
public static closing String MODID = “examplemod”;
public static closing String VERSION = “1.0”; @EventHandler
public void init(FMLInitializationEvent occasion)
{
}
non-public class ModBlock extends Block
{
}
Now you’ll be able to most likely guess the place that is going —the Block class is a vanilla Minecraft block. By extending it with our ModBlock class we will create our personal block, that includes properties of our design. Let’s begin fleshing out this class by including a constructor:
non-public class ModBlock extends Block
{
public ModBlock(Materials materials, String blockName)
{
tremendous(materials);
this.setBlockName(blockName);
this.setBlockTextureName(MODID + “:” + blockName);
}
}
This constructor ought to be fairly simple. We go in a Materials and a reputation for our block. There are a variety of supplies we will select from that can give our block sure properties, similar to rock, material or wooden, however for now we received’t fear about that. Let’s speak as an alternative about .setBlockName() and .setBlockTextureName(). .setBlockName() is how we decide what our block will probably be recognized as by the sport, and .setBlockTextureName() identifies what the identify of the feel our block will probably be utilizing is. It’s crucial that our block’s texture identify follows the conference of “[Mod ID]:[Block Name]”. Lastly lets add another line of code to our constructor in order that our block is accessible to us in Inventive Mode, our constructor turns into:
non-public class ModBlock extends Block
{
public ModBlock(Materials materials, String blockName)
{
tremendous(materials);
this.setBlockName(blockName);
this.setBlockTextureName(MODID + “:” + blockName);
this.setCreativeTab(CreativeTabs.tabBlock);
}
}
The above change tells the sport which “tab” our block ought to present up underneath within the Inventive Mode menu. With this, our ModBlock class is prepared for use. Let’s make our closing additions to the code.
@Mod(modid = ExampleMod.MODID, model = ExampleMod.VERSION)
public class ExampleMod
{
public static closing String MODID = “examplemod”;
public static closing String VERSION = “1.0”;
@EventHandler
public void init(FMLInitializationEvent occasion)
{
Block amethystOre = new ModBlock(Materials.rock, “amethystOre”);
GameRegistry.registerBlock(amethystOre, “amethystOre”);
}
non-public class ModBlock extends Block
{
public ModBlock(Materials materials, String blockName)
{
tremendous(materials);
this.setBlockName(blockName);
this.setBlockTextureName(MODID + “:” + blockName);
this.setCreativeTab(CreativeTabs.tabBlock);
}
}
}
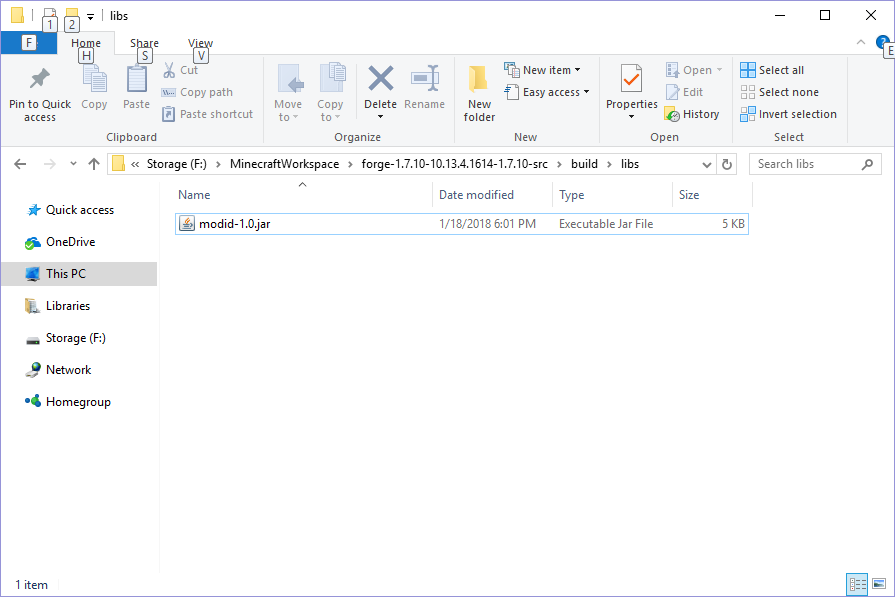
Right here we’re utilizing our “init” perform to initialize a brand new ModBlock named “amethystOre” after which utilizing the GameRegistry to register the block. Registering the block is a important step, as an unregistered block won’t be current within the recreation. With this, we will construct our mod, let’s return to PowerShell, and run
.gradlew construct
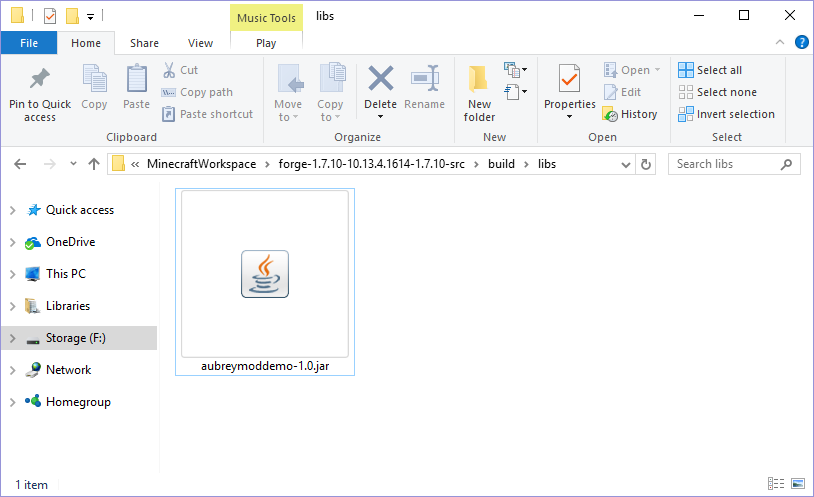
As soon as once more, as soon as the construct command has completed we’ll get a constructive “BUILD SUCCESSFUL” message. You must discover, inside your forge listing, that your mod has been constructed to the construct/libs/ subdirectory as “modid-1.0”:
Hopefully you’re acquainted with putting in a Forge mod, in the event you aren’t there are many tutorials elsewhere on-line that may enable you out.

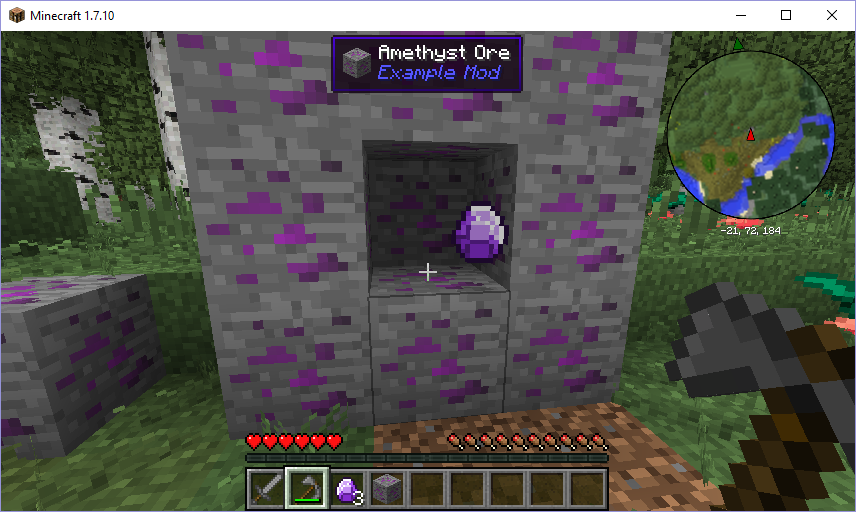
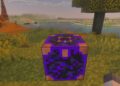
After getting put in your mod and began up Minecraft,it’s best to have the ability to find an odd wanting pink and black block named “tile.amethystOre.identify”. It’s pink and black as a result of we haven’t given it a texture to show, and its identify is a bit off as a result of we haven’t specified the plain English identify but. Let’s go forward and do this stuff as a result of they’ll be fairly straightforward to do and can make our block look significantly better.
Initially, right here is the picture I’ll use for our amethyst ore:
![]()
Go forward and save that (ensuring to call it amethystOre.png) we’ll wish to add it to our Eclipse mission in a selected listing in order that the sport is ready to find it. The listing we wish to place our block textures in is “srcmainresourcesassetsexamplemodtexturesblocks”. Ensure that is added correctly to your eclipse mission, it ought to look simply because it does in my Package deal Explorer pane right here:

Subsequent we’ll wish to create our language file (that is the place we’ll specify that we’d like our block to be known as “Amethyst Ore” as an alternative of “tile.amethystOre.identify”). This file will named “en_US.lang” (it should be named this to be acknowledged by the sport) and will probably be positioned within the “srcmainresourcesassetsexamplemodlang” listing, similar to this:
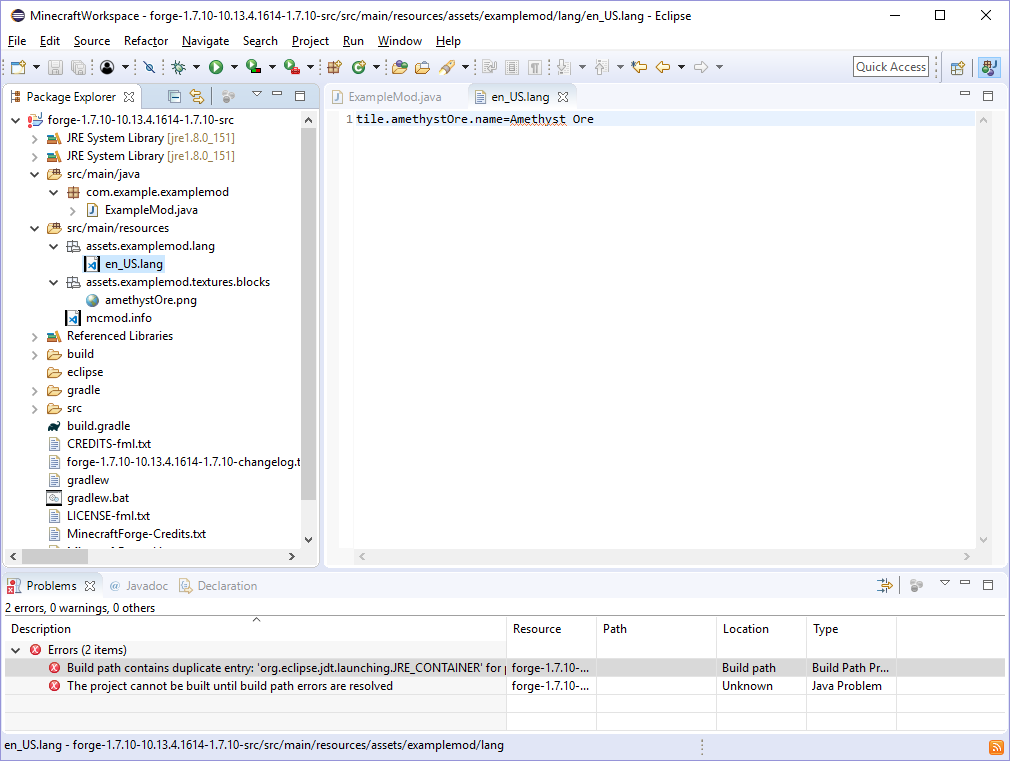
Inside our en_US.lang file, as you’ll be able to see above, we have to enter this line, with a purpose to map the “plain English” identify to the sport’s identifier:
tile.amethystOre.identify=Amethyst Ore
Ensure you save your en_US.lang file after which head again to PowerShell to run one other construct! With that it’s best to discover our Amethyst Ore block is sort of practical!

Congratulations are due, as at this level, you’ve created a easy mod for Minecraft! Chances are you’ll, nevertheless, have observed that this block breaks fairly simply, and doesn’t drop an ore as do different ore blocks in Minecraft like Iron or Gold. So let’s maintain engaged on it by first returning to our ModBlock subclass:
non-public class ModBlock extends Block
{
public ModBlock(Materials materials, String blockName)
{
tremendous(materials);
this.setBlockName(blockName);
this.setBlockTextureName(MODID + “:” + blockName);
this.setCreativeTab(CreativeTabs.tabBlock);
this.setHardness(4.0F);
this.setHarvestLevel(“pickaxe”, 1);
}
}
The above traces I’m including (.setHardness() and .setHarvestLevel()) are extremely necessary to customizing your block.
- .setHardness() determines how lengthy it’ll take you to interrupt the block, as you’ll be able to see it accepts a float worth. For comparability, Iron Ore has a hardness of three.0F, whereas Obsidian has a hardness of fifty.0F.
- .setHarvestLevel() determines what device you should use to interrupt this block. It accepts two parameters, a hardcoded string similar to “axe” or “shovel” that determines the usable device sort and an integer representing the “stage” of
* @param stage Harvest stage:
* Wooden: 0
* Stone: 1
* Iron: 2
* Diamond: 3
* Gold: 0
*/
* @param stage Harvest stage:
* Wooden: 0
* Stone: 1
* Iron: 2
* Diamond: 3
* Gold: 0
*/
So understanding that, you’ll be able to see that I’m programming our Amethyst Ore to be a bit more durable to interrupt than Iron, and to require a Pickaxe that’s fabricated from Stone or a more durable materials with a purpose to correctly harvest the block — that isn’t to say a picket pickaxe couldn’t break it, simply that you simply wouldn’t obtain the block’s drops while you use a picket pickaxe, very similar to Iron Ore.
In case you’d like, be happy to pause right here, construct your mod and check out these modifications. Once you’re prepared, let’s make our block drop Amethysts as an alternative of dropping the Amethyst Ore block itself.
As soon as once more, right here is the picture I’ll be utilizing for the amethyst itself, go forward and put it aside:
![]()
As a result of that is an merchandise and never a block we have to put it aside to a barely completely different listing: “srcmainresourcesassetsexamplemodtexturesitems” to verify what this seems to be like inside Eclipse, right here’s a screenshot of my Package deal Explorer at this level in creating our mod:

Now we’ll have to code our Amethyst merchandise. This code seems to be similar to our code for including a block, primarily we’ll create a ModItem class that extends the Minecraft Merchandise class and we’ll set our personal properties. We’ll then use the GameRegistry as soon as once more to register our merchandise. So again in ExampleMod.java, let’s create our ModItem class:
non-public class ModItem extends Merchandise
{
public ModItem(String itemName)
{
this.setUnlocalizedName(itemName);
this.setTextureName(MODID + “:” + itemName);
this.setCreativeTab(CreativeTabs.tabMisc);
}
}
Seems to be fairly just like our ModBlock class doesn’t it? This time we’re not passing in a cloth, solely the identify of our merchandise nevertheless. As soon as once more, we set the merchandise’s identify in order that the sport is aware of the right way to establish it, we set the feel identify so the sport is aware of the place to search out the feel for our merchandise, and we set which Inventive Mode tab the merchandise ought to be situated in. Now we simply have to edit our init() name to initialize the Amethyst merchandise:
@EventHandler
public void init(FMLInitializationEvent occasion)
{
Merchandise amethyst = new ModItem(“amethyst”);
GameRegistry.registerItem(amethyst, “amethyst”); Block amethystOre = new ModBlock(Materials.rock, “amethystOre”);
GameRegistry.registerBlock(amethystOre, “amethystOre”);
}
Take notice that, similar to with our ModBlock, we’re instantiating our ModItem after which registering it utilizing the GameRegistry. Let’s go forward and add the “plain english” identify for our merchandise to our en_US.lang file in order that the sport shows “Amethyst” as an alternative of merchandise.amethyst.identify! Our en_US.lang file ought to now appear to be this:
tile.amethystOre.identify=Amethyst Ore
merchandise.amethyst.identify=Amethyst
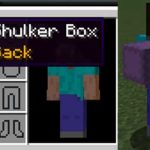
And with that we’ve added a brand new merchandise to the sport! Be at liberty to run a construct and check out the mod once more to search out our new merchandise within the “Miscellaneous” tab in Inventive Mode:
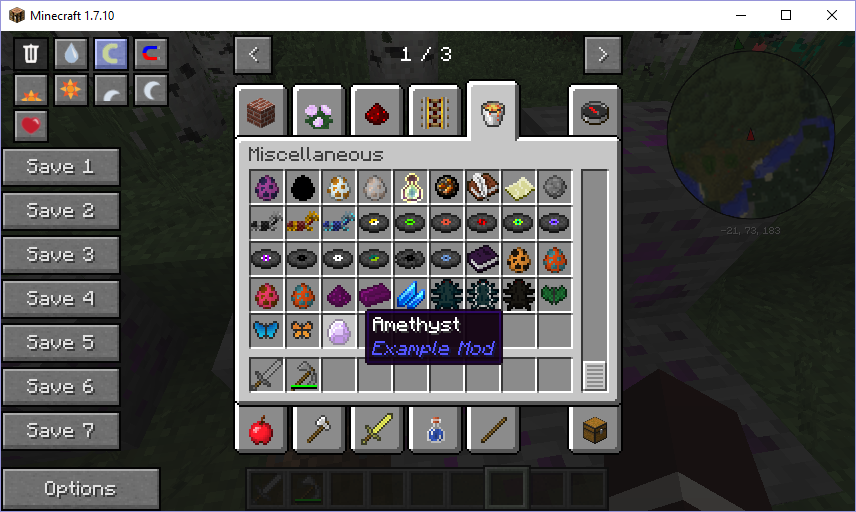 Observe that I’ve another mods put in right here as nicely, together with a few of my very own customized content material, however your Amethyst ought to look simply the identical.
Now, as you’ve most likely guessed, we wish our Amethyst Ore block to drop our Amethyst merchandise after we break it with a pickaxe! Let’s go forward and code that because it’s a reasonably accessible change to make. First we’ll wish to edit our ModBlock class to override the Merchandise class’ .getItemDropped() technique, it will appear to be this:
non-public class ModBlock extends Block
{
non-public Merchandise toDrop;
public ModBlock(Materials materials, String blockName)
{
tremendous(materials);
this.setBlockName(blockName);
this.setBlockTextureName(MODID + “:” + blockName);
this.setCreativeTab(CreativeTabs.tabBlock);
this.setHardness(4.0F);
this.setHarvestLevel(“pickaxe”, 1);
}
@Override
public Merchandise getItemDropped(int i, Random random, int j)
{
if(toDrop != null)
{
return toDrop;
}
else return Merchandise.getItemFromBlock(this);
}
}
Okay, in order that’s a substantial change we’re making. We’re giving our class the property of an Merchandise named “toDrop”, it will signify which merchandise our ModBlock will drop. Our overridden technique, .getItemDropped() is being overridden to perform the change of dropping our “toDrop” merchandise as an alternative of the same old block. In fact, if we don’t set a “toDrop” merchandise it’ll default to the block-dropping behaviour. Now we’ll wish to change our constructor in order that we will go during which merchandise we wish to drop. Our new constructor will appear to be this:
public ModBlock(Materials materials, String blockName, Merchandise toDrop)
{
tremendous(materials);
this.setBlockName(blockName);
this.setBlockTextureName(MODID + “:” + blockName);
this.setCreativeTab(CreativeTabs.tabBlock);
this.setHardness(4.0F);
this.setHarvestLevel(“pickaxe”, 1);
this.toDrop = toDrop;
}
As soon as we make this modification, we’ll after all have to alter how we’re instantiating this class in our .init() name:
@EventHandler
public void init(FMLInitializationEvent occasion)
{
Merchandise amethyst = new ModItem(“amethyst”);
GameRegistry.registerItem(amethyst, “amethyst”);
Block amethystOre = new ModBlock(Materials.rock, “amethystOre”, amethyst);
GameRegistry.registerBlock(amethystOre, “amethystOre”);
}
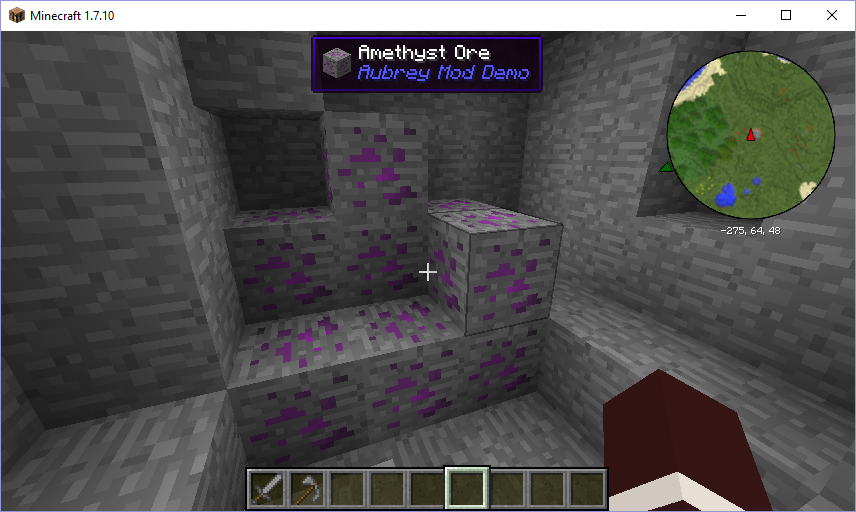
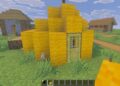
And with that closing change, it’s best to discover that your Amethyst Ore is now dropping Amethysts when harvested utilizing a pickaxe that’s fabricated from Stone (or a stronger materials):
 Hey, have a look at that, breaking an Amethyst Ore block actually did drop an Amethyst.
Let’s take a second to evaluate, as a result of at this level we’ve not solely simply gotten our modding instruments and atmosphere setup, however we’ve additionally used them and added a brand new block and a brand new merchandise to the sport, and we’ve completed so in about 70 new traces of Java code, two new textures, and just a little little bit of modifying to our .lang file. Clearly there’s plenty of routes we will take this in that you simply’re most likely questioning about, for instance:
- How can I make my Amethyst Ore block generate randomly all through the map?
We’ll get there — don’t fear, that is in spite of everything, meant to be a really complete information. Nonetheless, I’d wish to level out that that is the primary a part of the tutorial you’ve accomplished. Within the subsequent half we’ll restructure our mission after which delve deeper into among the modifications we will make with our block— however it’s best to really feel greater than free to take a break right here.
Welcome to the second a part of the information. I’d love to do some refactoring as our code, in its present state, is a bit messy. I’d wish to rename our mod, and transfer our ModBlock and ModItem lessons out into their very own .java information for group functions.
I’m going to call my mod “aubreymoddemo” however be happy to call your mod no matter you please. Renaming our mod is definitely going to be a reasonably difficult course of as there are a selection of locations we’ll wish to take into accounts:
- Our Eclipse mission identify
- Our most important bundle, at present named com.instance.examplemod
- Our most important Java file, at present named ExampleMod.java
- Our MODID property inside that ExampleMod class.
- Our textures location, at present named belongings.examplemod.textures
- Our lang information location, at present named belongings.examplemod.lang
- Our mcmod.information file (which we now have but to have a look at)
- Our construct.gradle file (which we now have additionally but to have a look at)
As long as we’re in keeping with our naming conference nevertheless we shouldn’t have any bother. Let’s deal with this renaming course of in the identical order above.
- First issues first let’s right-click our “forge-1.7.10-…” mission within the Package deal Explorer, and choose Refactor -> Rename and rename our mission.
- Now, let’s right-click our com.instance.examplemod bundle, and once more choose Refactor -> Rename and rename it.
- Subsequent I’m going to Refactor -> Rename our ExampleMod.java and identify it “Fundamental.java” as it’s the most important part of our mod.
- Now let’s Refactor -> Rename our belongings.examplemod.textures and belongings.examplemod.lang bundle that our sources are in.
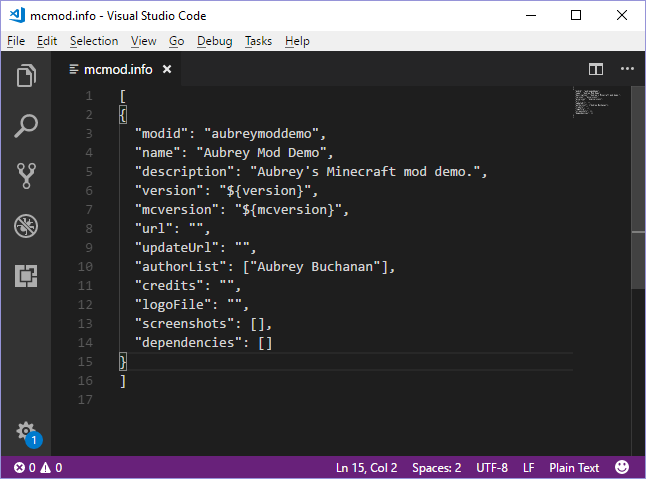
- Subsequent, let’s open up our mcmod.information file (it ought to have been created for you and ought to be seen inside ‘src/most important/sources’ within the Package deal Explorer). You must see a variety of fields you’ll want to edit, similar to “modid”, “identify”, “description” and “authorList”. Right here’s how I’ve edited mine:
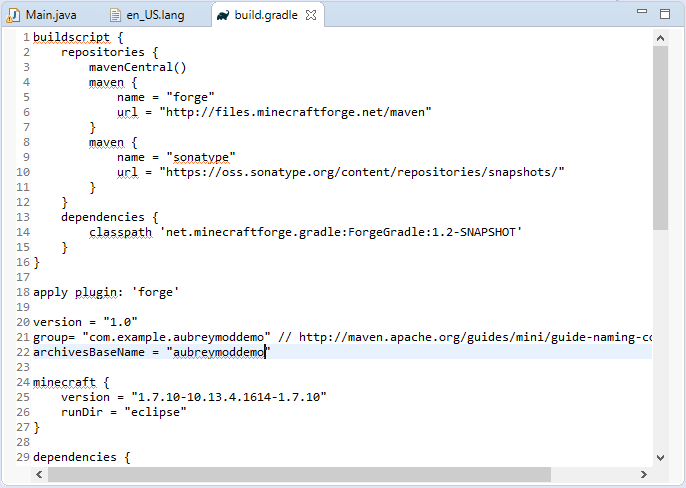
- Lastly, let’s open up our construct.gradle file (you must also have the ability to find this within the Package deal Explorer). We’ll wish to make modifications to the traces round line 20 the place the values are set for “group” and “archivesBaseName”. As soon as once more, right here’s how I’ve edited mine (notice the one modifications I made have been on traces 21 and 22):
Ensure you save all the things after which run a construct. You must discover that when your mod is constructed now, it’s really named along with your modid! That’s a results of the change we made to our construct.gradle.
It’s necessary for us to construct and check our mod at this level because it’s all too straightforward to slide up and misname one thing. In case you discover you’ve gotten lacking (pink and black textures) or your “plain English” names aren’t being displayed, return and double verify the record above to make sure you’ve named all the things identically. In case it might enable you, right here’s a look at my Package deal Explorer after making these modifications:

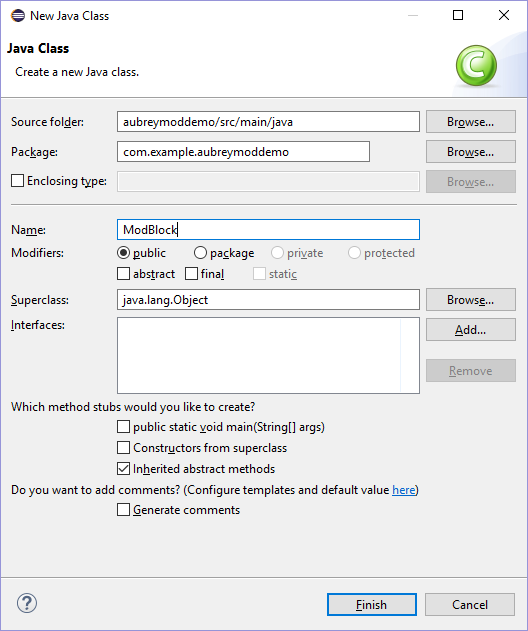
Subsequent, we’re going to separate the code in our Fundamental.java into distinct lessons. Proper-click the “com.instance.aubreymoddemo” bundle (or no matter you might have named it) and choose New -> Class. We’ll do that twice, naming one “ModBlock” and the opposite “ModItem”. No want to fret about all of the choices right here, you’ll be able to simply choose ‘End’ after coming into the identify of the category.
We’ll now lower and paste the code from our lessons, at present in Fundamental.java, into their new houses in ModBlock.java and ModItem.java. For every class there will probably be some minor modifications, so look rigorously:
public class ModBlock extends Block
{
non-public Merchandise toDrop;
public ModBlock(Materials materials, String blockName, Merchandise toDrop)
{
tremendous(materials);
this.setBlockName(blockName);
this.setBlockTextureName(Fundamental.MODID + “:” + blockName);
this.setCreativeTab(CreativeTabs.tabBlock);
this.setHardness(4.0F);
this.setHarvestLevel(“pickaxe”, 1);
this.toDrop = toDrop;
}
@Override
public Merchandise getItemDropped(int i, Random random, int j)
{
if(toDrop != null)
{
return toDrop;
}
else return Merchandise.getItemFromBlock(this);
}
}
Take notice that our class is now declared as “public” in that first line above. Additionally notice that our MODID worth is definitely saved in Fundamental.java, so we’ll have to confer with it by including a prefix, altering it to Fundamental.MODID. These similar modifications will apply to your ModItem class as nicely.
As soon as once more, after making these modifications let’s guarantee we’ve saved all the things after which run a construct and check our mod. Frequent testing while you’re modding will assist slim down the troubleshooting course of ought to one thing go flawed, so it’s a terrific behavior to construct when you’re forward.
In any case, with these modifications out of the best way, we’re prepared to start out digging deeper into our mod. Let’s begin by making our block, Amethyst Ore begin spawning at random all through the world!
To do that, we’ll want implement the IWorldGenerator class, so let’s right-click our “com.instance.aubreymoddemo” bundle (or once more, no matter you’ve named your mod) and choose New -> Class. As soon as once more, we solely want to fret ourselves with the identify of the category, and we will name it ModWorldGenerator. Let’s open up our new class and implement IWorldGenerator, like this:
public class ModWorldGenerator implements IWorldGenerator
{
@Override
public void generate(Random random, int chunkX, int chunkZ, World world, IChunkProvider chunkGenerator, IChunkProvider chunkProvider)
{
// TODO Auto-generated technique stub
}
}
You’ll discover that by simply including the key phrases “implements IWorldGenerator” you’ll be prompted to implement the .generate() technique. We’ll depart this class on this state for now, as we’ll have to make some modifications in Fundamental.java with a purpose to entry our amethystOre block in our ModWorldGenerator. What we have to do in Fundamental.java is declare our objects and blocks in order that they’re publicly out there. This may look one thing like this:
@Mod(modid = Fundamental.MODID, model = Fundamental.VERSION)
public class Fundamental
{
public static closing String MODID = “aubreymoddemo”;
public static closing String VERSION = “1.0”;
public static Merchandise amethyst;
public static Block amethystOre;
@EventHandler
public void init(FMLInitializationEvent occasion)
{
amethyst = new ModItem(“amethyst”);
GameRegistry.registerItem(amethyst, “amethyst”);
amethystOre = new ModBlock(Materials.rock, “amethystOre”, amethyst);
GameRegistry.registerBlock(amethystOre, “amethystOre”);
}
}
Observe the brand new public static declarations close to the highest. Now that our blocks and objects are publicly accessible let’s head again to MapWorldGenerator.java to get issues going. First, we’ll wish to add a block property and a veinSize property and a constructor that accepts these as parameters. Your class ought to look one thing like this:
public class ModWorldGenerator implements IWorldGenerator
{
non-public Block block;
non-public int veinSize;
ModWorldGenerator(Block block, int veinSize)
{
this.block = block;
this.veinSize = veinSize;
}
@Override
public void generate(Random random, int chunkX, int chunkZ, World world, IChunkProvider chunkGenerator, IChunkProvider chunkProvider)
{
// TODO Auto-generated technique stub
}
}
Now we will flesh out our .generate() technique:
@Override
public void generate(Random random, int chunkX, int chunkZ, World world, IChunkProvider chunkGenerator, IChunkProvider chunkProvider)
{
if (world.supplier.dimensionId == 0) {
this.runGenerator(new WorldGenMinable(block, veinSize), world, random, chunkX, chunkZ, 20, 0, 64);
}
}
Now, you’ll discover that we haven’t created a .runGenerator() technique but. Our .runGenerator() technique will do a bit of labor for us to make sure that the veins of amethystOre (or every other block) are really randomized. I needed to make particular notice of this .runGenerator() technique as I discovered it from this wonderful tutorial. At giant, this technique had simply been lifted because it was in that tutorial because it really is an ordinary in world technology, and it may be used for all world technology functions actually. In any case right here it’s:
non-public void runGenerator(WorldGenerator generator, World world, Random rand, int chunk_X, int chunk_Z, int chancesToSpawn, int minHeight, int maxHeight)
{
if (minHeight < 0 || maxHeight > 256 || minHeight > maxHeight)
{
throw new IllegalArgumentException(“Unlawful Peak Arguments for WorldGenerator”);
}
int heightDiff = maxHeight – minHeight + 1;
for (int i = 0; i < chancesToSpawn; i ++)
{
int x = chunk_X * 16 + rand.nextInt(16);
int y = minHeight + rand.nextInt(heightDiff);
int z = chunk_Z * 16 + rand.nextInt(16);
generator.generate(world, rand, x, y, z);
}
}
Final, however not least, we’ll want to go again to Fundamental.java and use the GameRegistry to register our new WorldGenerator:
@EventHandler
public void init(FMLInitializationEvent occasion)
{
amethyst = new ModItem(“amethyst”);
GameRegistry.registerItem(amethyst, “amethyst”);
amethystOre = new ModBlock(Materials.rock, “amethystOre”, amethyst);
GameRegistry.registerBlock(amethystOre, “amethystOre”);
GameRegistry.registerWorldGenerator(new ModWorldGenerator(amethystOre, 6), 0);
}
Take notice that right here we’re instantiating a brand new ModWorldGenerator contained in the .registerWorldGenerator() name. We go the values of amethystOre (to specify which block we wish to generate on this planet) and 6 (to specify the dimensions of the veins to generate of amethystOre). Chances are you’ll discover that .registerWorldGenerator() is definitely really accepting two parameters, our new ModWorldGenerator() AND and integer, on this case “0” — in case you’re questioning, in accordance with the JavaDoc this zero represents “a weight to assign to this generator. Heavy weights are likely to sink to the underside of
* record of world turbines (i.e. they run later)”.
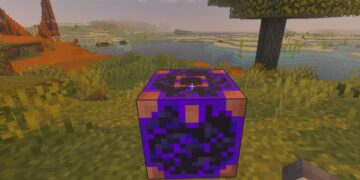
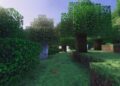
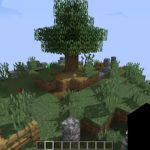
As soon as once more, let’s guarantee all the things is saved after which run a construct, set up our new construct and check our mod. You’ll wish to create a brand new world (or discover some uncharted territory in an previous one) to activate your newly applied world technology. It really didn’t take me too lengthy to stumble throughout some Amethyst Ore within the wild:
Now congratulations are actually so as! You’ve gone from putting in Eclipse to implementing world technology in your mod with only a single information!


